Saturday, November 22, 2014

Thanksgiving Sides: My Favorite!

So yes, it's been a while.  You know the drill.  The recipes are still sitting there, waiting for me to put them on this blog, but shiny things keep distracting me.  Life.

However, in honor of Thanksgiving (my favorite holiday to eat at), and the fact that I am for the first time traveling and contributing to the meal, I thought I would post two of the sides I am making.  They are primal(ish), easy to make, and delicious.  In fact, I make them quiet often with my chili, or other meals.  However, as is the case with many of my more frequently used meals, I often do not properly document them.  So this will be a post with minimal pictures.  Just use your imagination, or try it for yourself!


Just Corn Bread

  • 2 cups stone ground corn meal
  • 2 tbsp coconut flour
  • 1 cup milk
  • 2 eggs
  • 3 tsp baking powder
  • 1/2 tsp salt
  • 1/4 cup oil
  • 1-2 tbsp honey (if desired)


Combine all ingredients, and place in a well-greased bread pan or muffin tin.  Cook at 425 degrees for 25 - 35 minutes, until top is golden brown.  That's it!  I prefer mine with lots of butter and honey while it's still warm.  Just saying.

Really Bad But Good Mashed Potatoes


  • 3 large peeled potatoes cut in one-inch chunks (about 4 cups)
  • 1/4 cup sour cream
  • 3 tbsp butter
  • cream or milk to desired consistency (about 1/4 cup)
  • 1 tsp garlic powder
  • 1 tsp onion powder
  • salt and pepper to taste
  • 1/4 cup cheddar cheese


Heat potatoes in pyrex with water for 25 mins in the microwave, or boil them if you want to keep an eye on them.  When soft enough to put a fork in and have it fall off, let cool for a minute or two.  Next, add all ingredients (except cheese) to a Cuisinart (or mix with a hand mixer).  Pulse/mix to the desired consistency, adding more milk if too thick.  When it's the way you like it (I like mine with no lumps), add the cheese and fold in.


Done!  Serve with turkey, or the meat of your preference... potatoes pictured below with pork chops :)


Well, that's all for now.  Enjoy... and have a very happy Thanksgiving!

Saturday, August 2, 2014

Recipe Update... Ginger Muffin (Protein Version)


Well, anyone close to me already knew this, but now there's proof for the rest of you.  I change my own recipes as much as I do others!  It's usually because I hate measuring things (serious lazyness), but sometimes it's because I just think there's a slightly different way to make an old recipe even more delicious.

Take the below, for example.  The first try was good, really zesty and sweet, but pretty moist.  And I'm an on the go type of eater.  My food has to be able to stand up to the test of my purse.  So, I decided to alter the recipe a bit, add some more protein, firm things up, and see what happened.  The result was delicious, and a better purse traveler than the original... and now there's pictures! (Don't worry, you can still find the inspiration on the original post, along with two other yummy breakfast items you might have forgotten about.)

That's it for this rainy Saturday.  Enjoy!


Protein Ginger Muffin
  • 1 mashed banana
  • 1/2 cup sweet potato puree
  • 1 egg
  • 2 tbsp coconut flour
  • 2 tbsp unflavored protein powder (Sunwarrior Blend)
  • 1/3 cup flaxseed meal
  • 1 1/2 tsp ginger
  • 1 tsp cinnamon
  • 1 tsp baking powder
  • 1/2 tsp baking soda
  • 2 tbsp hemp hearts (optional)
  • 1tbsp agave syrup (optional)


Mix all ingredients in a bowl, making sure there are no lumps.  Put in a greased muffin tin and bake at 350 for about 45 minutes.  Again, they are less moist than the originals, but I leave them in until I think they might burn, but the choice is yours.  Best way to eat is cu tin half, toasted, with lots of melted butter!


**this has been an R&E original


Tuesday, July 15, 2014

Too Hot to Cook? Chicken Tacos Easy!

Everyone might assume that since it's summer and I have this abundance of time on my hands that Eric comes home to a meal each night that took hours of preparation.  I mean, what else am I doing with my time, right?!  Wrong.

It's been hot.  Like really really hot.  As in AC is on but I am still laying under this fan sweating hot.  Why do I want to be standing in a kitchen perspiring when I can be reading on the roof, battling pirates on Xbox, or avoiding my long list of summer projects?  However, since Eric IS at work, and I do feel slightly obligated to cook SOMETHING since I am sitting around all day, I like to get creative.  But with as minimal sweating as possible.

I think I've said before that we like tacos.  Okay, I couldn't find a post where I said it directly, so that must just be my old lady brain replaying conversations as things I've written down.  But we do.  We like tacos, or less specifically, mexican food.  A.lot.  As in hey, let's have tacos every night.  Shrimp, chicken, pork, beef... that's 4 days of deliciousness right there.  Heck, our wedding was a smorgasbord of everything you'd find at a mexican restaurant.  Who needs fancy cuts of meat when you can make your own enchiladas?  Plus I find tacos are easy to make, and who can beat an easy meal that tastes incredible?

Anyways, this is another easy recipe that only requires you to sweat for as long as it takes you to flip and season the other side of the chicken breast.  I love this meal because it makes tacos (duh), but also makes a quality meal that is healthy and filling while being quick.  It's the type of thing you can prep in about 5 minutes, throw in the oven, do your workout/cleaning/reading/pirate beating, and still have a lovely meal ready for whenever hunger strikes.  Plus it's applicable year round.  Think winter when you ALSO don't want to cook because it's too cold to move (I swear, I do enjoy cooking sometimes).

I think you get it.  So here's what you do...

Oven Mexican Chicken

  • 2 lbs thawed chicken breast or thigh
  • olive oil
  • garlic powder
  • cajun seasoning
  • cumin
  • chili powder
  • salt and pepper

Place chicken on a baking sheet.  Drizzle olive oil onto chicken.  Sprinkle spices on top, enough to coat one side of chicken. Rub into meat. Cook at 350 for 15 minutes, then flip, sprinkle/rub again.  Put back in oven for another 10 minutes at 350 plus another five on high broil.


Note:  If you are extra lazy and your chicken is still frozen you can still do this... just do 25/20/5 instead!


Check to make sure the inside is not pink, but still moist, and remove from oven.  Let sit for about 5 minutes, then slice and eat with your choice of sauteed veggies and topping. Pile it all on to corn tortillas, or lettuce wraps.  And of course I recommend the below guacamole by Eric.


Eric's Guacamole
(large mortar and pestle recommended)
  • 2 ripe avocados
  • 1/3 small yellow onion (minced)
  • 1 clove minced garlic (crushed)
  • 1 tsp sea salt
  • 1 1/2 tsp lime juice
  • pepper to taste
Note:  We do not use hot sauce or tomatoes or cilantro.  That's Eric's fault, he hates them.  And mine too, because I can't handle spicyness.  If you wanted to add those I wouldn't judge...

Second note: I strongly recommend investing in a large mortar and pestle and an avocado masher to make your guacamole... it's worth the weight.

First add the salt, onion, and garlic to the mortar, or a bowl.  Mash this with the pestle or a spoon if in a bowl to release the juices and until salt is a powder (It's hard to do in a bowl, see?  This is why I told you to get a mortar).  Remove the avocados from their skin.  If you don't know how YouTube it or something, it's not hard if you use a spoon.

Use mash the avocado, until a consistency you like.  Then add salt/pepper/lime juice.  Mix gently.  Taste.  Add anything you think is missing.  Then put in a bowl and get ready to eat with your tacos.  Or chips.  Or just off the spoon.

Mmmmmm, enjoy!


**these have been R&E originals

Thursday, July 10, 2014

Summer on the Run? Chocolate Sea Salt Cookies!

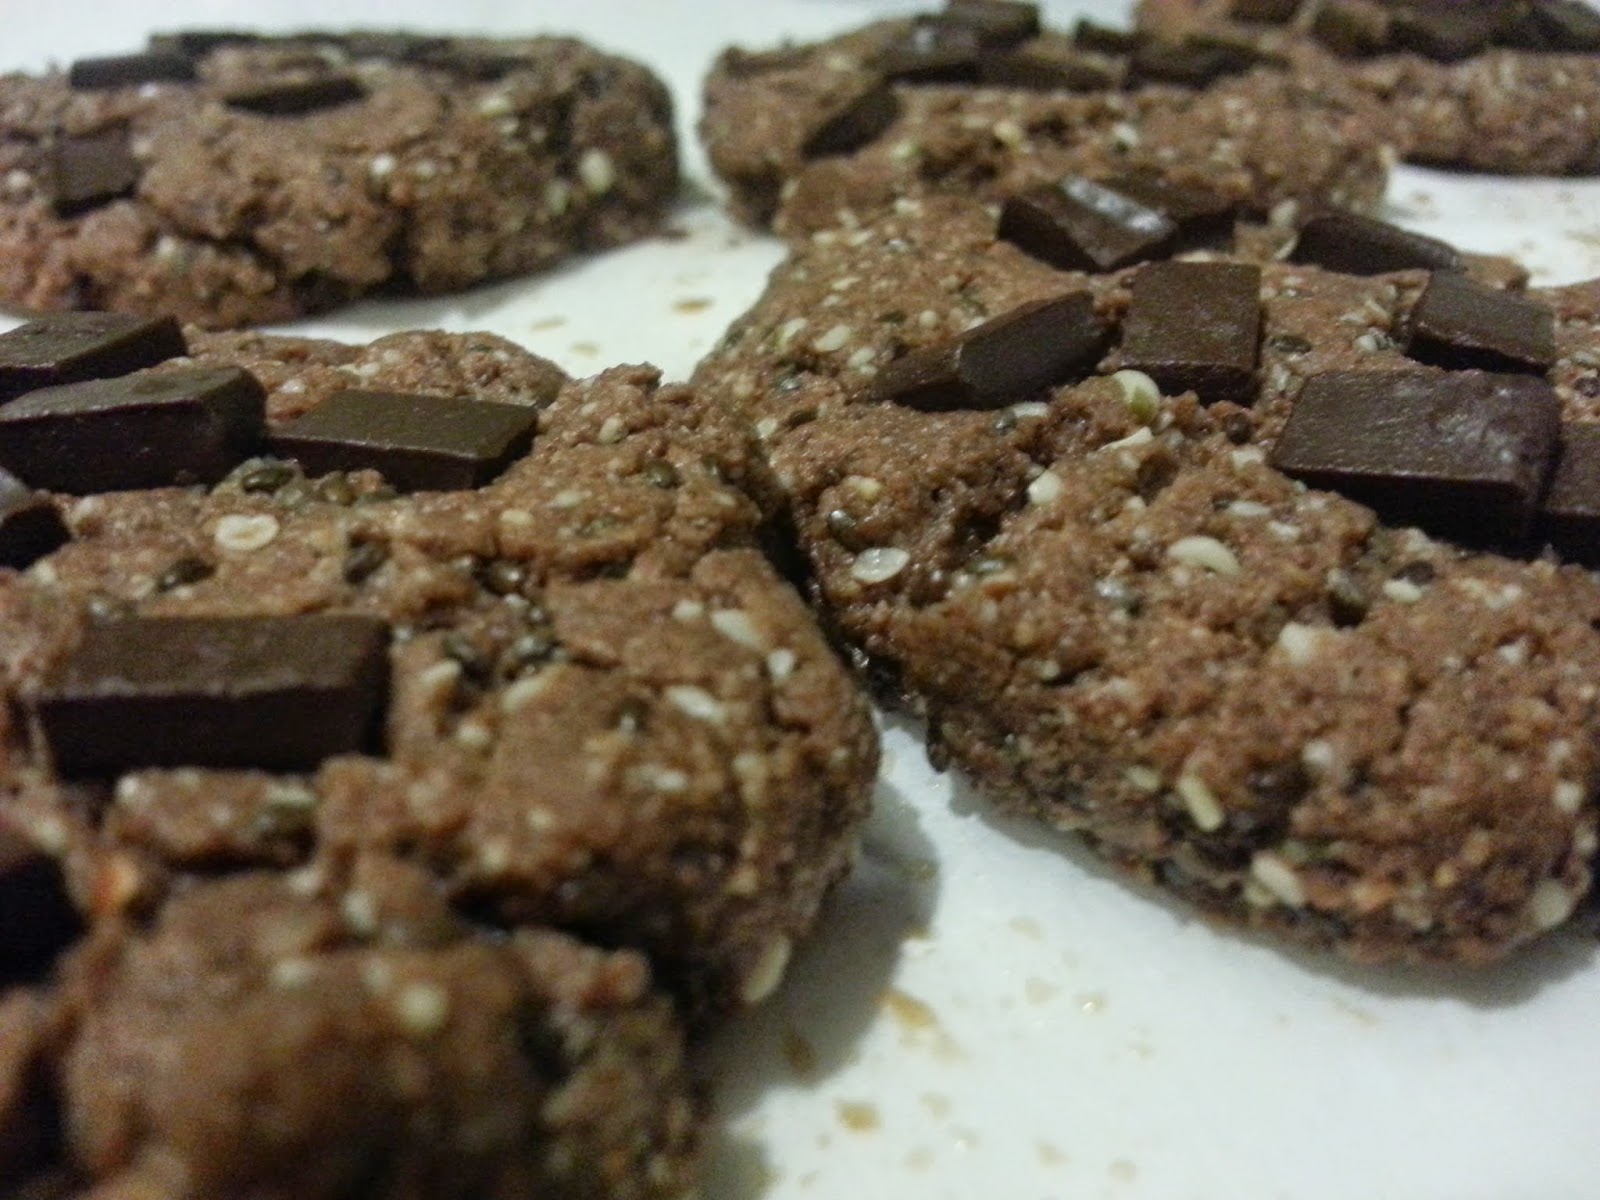
Summer is officially in full swing, and that means vacations, sunshine, relaxing, and of course... camping and hiking!  Now, these cookies are the perfect evening snack, but they also pack a protein punch so they are perfect for throwing in your bag for a quick meal on the run.  Whether you are lounging at the beach and too lazy to head up for lunch, or bagging that next peak, these cookies are for you.  And they're easy and quick to make!

Chocolate Sea Salt Cookies

  • 1 cup almond butter (or any other nut butter)
  • 1/4 cup unflavored protein powder
  • 1/4 tsp sea salt
  • 1/8 cup chia seeds
  • 1/4 cup hemp seeds
  • 1/4 cup shredded coconut
  • 2 tbsp cocoa powder
  • 1/2 tsp baking powder
  • 1 tbsp maple syrup
  • 1/4 cup milk
  • 1/4 - 1/2 cup dark chocolate chips
Preheat oven to 350.  In a food processor, combine all ingredients except chocolate chips.  It will form a big sticky ball.  That's okay.  Just keep your fingertips moist with water and you will be fine

Form "dough" into 8 equal balls.  Place on lined baking sheet.  Flatten.


Add chocolate chips to the top, pressing in a bit.


Place in oven and bake for 10-20 minutes, until they are firm but not burned.
Let cool before removing from the cookie sheet, then either pack them away for your next adventure or... enjoy!


**modified from http://mywholefoodlife.com/2014/04/14/flourless-chocolate-cookies/

Sunday, May 11, 2014

Strawberry Cinnamon (or other) Scones

Since it's Mother's Day, this will be short.  Since my parents were visiting this weekend, I made these for my mom and she (and my father) really liked them.  This recipe is a great base for any type of scone, but the one I tested out is shared below.  It's pretty easy to make, and really feel free to try out any modifications... and maybe even share them with me! :)

Strawberry Cinnamon (or other) Scones
  • 3 tbsp honey OR 1 ripe banana, mashed
  • 1/8 cup grapeseed oil
  • 1 egg
  • 1/2 tsp vanilla
  • 1 cup almond meal
  • 1/4 cup protein powder (I use Warrior Blend Natural Flavor)
  • 1 tsp coconut flour
  • 1/2 tsp baking soda
  • 1/2 tsp nutmeg
  • 1/2 tsp cinnamon
  • unsweetened, freeze-dried strawberries (from Trader Joe's) OR other fruit/filling/choc chips
  • 2 tbsp cinnamon (topping)
  • honey drizzle (topping)

Combine all ingredients except strawberries.  When well mixed, fold in strawberries.  Place dough in shape you desire on a greased, parchment lined, baking sheet and press down to flatten them.


Powder with cinnamon, then drizzle with more honey if wanted.  Bake for 25 - 35 minutes, until golden brown.


As always, enjoy!
*this has been an R&E original

Thursday, April 3, 2014

Leftover Mashed Potatoes? Mashed Potato Benedict!

A very quick post, but I just had to share.

If you ever have leftover mashed potatoes and are feeling like spicing them up, add some garlic powder, salt, and pepper, and make them into patties about the size of your palm.

Then fry them up, saute some spinach, and on top of it all some over easy eggs with melted cheese over it all.  Hot sauce of your choice, maybe some pancakes, and voila, breakfast, lunch, or dinner... quick, easy, delicious!


*an R&E original


Sunday, March 23, 2014

Still Comfort Food Season... Easy Italian Chicken Bake!

I thought I might like March this year, but so far I am still unimpressed.  In fact, instead of prepping for spring, I am finding myself yearning for deep winter comfort foods.  Enter my latest creation.  It's warm, cheesey, healthy, and full of tender chicken protein.  Not only that, but this was a pretty painless meal to prep for, with minimal clean up (another big plus in my book).

Well, since it's March I don't have much else to say, but I don't mind sharing... so here it is!

Easy Italian Chicken Bake
  • 2 lbs chicken breast or thigh
  • 1 head broccoli, cut into small chunks
  • 1/2 onion, diced
  • 1 pepper, diced
  • 2 tbsp olive oil
  • 16 oz can of diced tomatoes
  • 2 tbsp tomato paste
  • 1/2 cup shredded mozzerella
  • 1/4 cup grated parmesan
  • 1 tbsp butter (if adding pasta or rice)
  • 1/2 tsp garlic powder
  • 1/2 tbsp Italian seasoning
  • salt and pepper to taste

Season chicken breast with garlic powder, Italian seasoning, salt and pepper to taste, and drizzle with olive oil.  Broil on high for about 5 minutes each side, until pink is not clearly visible on surface.  Remove from heat and let cool as you prepare the rest of the items.  


Add veggies to greased casserole dish with the garlic powder, Italian seasoning, salt aand pepper, and olive oil.  Toss a few times.  You can saute the veggies a bit to soften and add flavor, but if you are super lazy and want the meal easier then don't.


Dice the broiled chicken and add it along with the juices to the casserole dish.  Don't panic, there should be a hint of pink still.  Again, if you would rather pan fry this instead you can, just adds to the level of effort.  Next mix the diced chicken, tomatoes, tomato paste, and cheeses into the dish with the veggies.  Dot with the butter on top and sprinkle more cheese as you see fit.


Bake at 375 for 25 - 35 minutes.  Serve over rice, add garlic, more cheese, more sauce, more veggies, more meat, or even PASTA... the possibilities are endless.


And of course, enjoy!

*this has been an R&E original


Wednesday, March 12, 2014

Minimally Modified #2: Thai Meatballs and Noodles

Thanks to a good friend who loves Pinterest even more than me, this recipe came into my life.  We were planning a romantic double date with our (at the time) boyfriends, and Sarah suggested this menu.  I immediately started drooling, which became even more pronounced when I TASTED the meal, and promptly went home and marked it as "must make primal".

Of course, this is minimally modified because I really only changed some measurements, not the basic recipes, and removed some of the soy sauce-age because it seemed to be a lot.  Anyways, if you want to use the originals they are here and here.

I recommend making this in two parts.  Prep the meat and throw it in the oven, combine the ingredients for the noodle sauce and dipping sauce, then deal with cooking the noodles with about 5-10 minutes left on the meatballs.  Oh, and DO NOT make this meal when you are short on time.  It is a soothing work of art and cannot be rushed.  Or because you will burn the oil and stink up your condo and yourself and traumatize the dog.  Either one.  Just a warning.  It IS worth it tho :)


Noodles and Sauce
Package of rice or soba noodles, boiled and strained
  • 1 tbsp crushed red pepper
  • 2 tbsp sesame oil
  • 1/4 cup grapeseed
Optional for topping after cooking:
(I don't usually use)
  • 1 shredded carrot
  • 1/2 cup green onions

Meatballs
  • 1/4 cup cashew or almond meal
  • 2 lbs ground turkey (or beef)
  • 1 egg
  • 1 tbsp ginger, minced
  • 1/2 tsp onion powder
  • 1/2 tsp garlic powder
  • 1 clove garlic, minced
  • 1/2 tsp salt
  • 1 tbsp low sodium soy sauce
  • 2 tsp sesame oil
  • 1/4 cup chopped cilantro (optional)
  • 3 scallions, chopped (optional)

Dipping sauce
  • 3 tbsp low sodium soy sauce
  • 2 tsp sesame oil
  • 3 tbsp fresh lime juice
  • 2 tbsp water
  • 1 chopped fresh scallion (optional)

Preheat oven to 500 degrees. In a bowl put ground turkey and all other meatball ingredients.  Mix with your hands until combined well.  Shape 1/4 cup meat mixture into a ball or mini patty and transfer to a greased baking pan.  Repeat.  Bake until cooked through, about 15 minutes... watch carefully or they dry out!


For noodles, heat oil mixture in pan over low heat for no more than 2 minutes.  Again, watch carefully because it burns (I do this every time and have to start again).  Strain out pepper, save oil. Once cooled a bit, mix with 2 tbsp soy sauce, 1 tbsp of lime, and toss with cooked noodles and 3 cups chopped spinach.


For the dipping sauce mix together all ingredients.  Add scallions if desired.  Leave this on the side for hungry peoples to drizzle as you see fit... I usually have to make more because Eric steals it all.


That's it.  Dig in... oh, and of course, enjoy!

Thursday, March 6, 2014

Travel Dessert: Crunchy Cinnamon Hermit Cookies

I was a weird kid.  There are many reasons and examples of this, but the one that always comes back to make is my eating habits.  While everyone else was busy eating chocolate chip cookies or Oreos, I was drooling over things like gingersnaps or hermit cookies.  Oh, hermits.  They had the perfect blend of random ingredients thrown in, plus a kick of ginger, and always left me satisfied.  Of course, since I don't really eat flour anymore this is always one of my tortures when I head up into NH or VT and into a little coffee shop with homemade delights... wishing I could eat the damn hermit cookies.

So in honor of our trip to VT this weekend, I bring you not ginger, but cinnamon, hermit cookies.  Why cinnamon?  Because that's what I made, and it pairs perfectly with the sea salt, chocolate chips, and raisins.  Could you try ginger?  Sure, go for it!  Let me know how it turns out.  But in the meantime, here's the goods... short and sweet, just like today's recipe (see what I did there?)  These cookies are DENSE, filling, HEALTHY, and delicious.  We are taking a bunch as our chair lift snack for our ski trip this weekend... enjoy!  (Oh, and sorry about the pictures.  Not my best, but at least there's something...?)

Crunchy Cinnamon Hermit Cookies
  • 1 cup almond flour
  • 1/2 cashew flour or GF oats or regular oats
  • 2 tbsp chia seeds
  • 2 tbsp ground flax seeds
  • 1/4 cup hemp seeds
  • 1 tsp ground cinnamon
  • 1/2 tsp sea salt
  • 1/2 tsp baking powder
  • 1/4 cup shredded coconut
  • 1/4 cup dark chocolate chips (optional)
  • 1/2 cup organic raisins
  • 1/8 cup butter or coconut oil, melted
  • 2 tbsp milk or coconut milk
  • 1 tsp vanilla extract
  • 1/4 cup peanut butter or almond butter
  • 2 eggs 
  • 1tbsp – 1/4 cup pure maple syrup, raw honey or raw agave (optional)


Pre heat oven to 350.  Combine ingredients, wet first, then dry.  Scoop out the dough and roll into balls. Place on parchment-lined cookie sheet and gently press down with a spoon... sticky, careful!


These cookies don’t spread so you need to press them down to help them cook evenly.  Bake for about 25 - 30 minutes or until they are starting to turn light brown... dark brown and you've gone too far and will have crispy raisins.


Definitely let them cool before you eat... they get pretty hot!


**modified from www.http://simplylovefood.com


Monday, January 27, 2014

A Quick Meal: Lazy Cheesey Taco Dip

It's midwinter and I am sick of cooking creative meals.  Of course that means we could order delivery, but when my conscious gets the better of me that means I still have to cook.  Now, any day (or every day) of the week Eric and I have no problem eating tacos.  In fact there have been several weeks we had chicken tacos, then beef, then pork... then leftovers!  Why not?  Add a little guacamole and you've got a feast.  Plus it's easy.

But the recipe I want to share with you is even lazier than tacos.  That's right.  Lazier.  I mean, some days you just can't make your own individual tacos.  Having to physically layer the meat, then cheese, then all those toppings, FOUR TIMES?  Blech, I am tired just thinking about it.  No, some days you just need to take some chips, and dip.  Enter lazy taco dip... it's easier than prepping all those pesky shells, and equally delicious.  AND it's healthy!  We are fans.

Okay, let's do this.

Lazy Cheesey Taco Dip


  • 2 lbs ground beef
  • 1 pepper, diced
  • 1/2 onion or 1 bunch scallions, diced
  • 1 packet taco seasoning
  • 1 cup of spinach (per taco bowl)
  • Your choice of cheese (American or cheddar is my favorite)
  • Hot sauce of your preference
  • Salt and pepper to taste
  • Tortilla chips for dipping
  • Other taco dipping condiments


Step One: Make taco meat.  I saute the pepper and onion for a few minutes, then add the meat and brown it.  Add contents of the seasoning packet when there's a bit of pink left.


Step Two: Put a cup of spinach in the bottom of a bowl, add meat on top (you choose how much you want), layer cheese on top (not too much).


Step Three: Microwave for 1 minute, mix everything in bowl together, grab your chips and dipping paraphernalia (I recommend guacamole and sour cream), and you're done!  If you are against microwaves go ahead, layer it in a pyrex and heat it in the stove.  But then it's not quick, just easy.


Remember to add some hot sauce if you want, and as always, enjoy!


*this has been an R&E original


Sunday, January 12, 2014

Playoff Time: Steak Bomb Pizza or Nachos!

This will be short.  Same story, different month... so many recipes, so little time.  However, this recipe was too amazing not to post as soon as possible.  Combine that with football playoffs and you really can't go wrong.  Whether you make these for nachos, pizza,  or just eat it plain, any way you choose, there is no way you won't enjoy!

Steak Bomb Topping

  • 1 lb shaved steak
  • 1 pepper, chopped
  • 1 small onion, chopped
  • 2 cups chopped raw spinach
  • 2 tbsp butter
  • 1 tbsp soy sauce
  • 1 tsp garlic powder
  • 1 tsp onion powder
  • Salt and pepper to taste
  • Pepperoni (optional topping) 
  • Tortilla chips, pizza crust, or nothing

If making nachos or pizza:

  • Shredded mozzerella
  • 2 slices American Cheese

Heat the butter in a pan with the onions and peppers, mix until beginning to soften.  Then add the steak and spices except the soy sauce.  Continue to mix and separate meat into small bits.  Once there is only a small amount of pink left add the soy sauce and spinach, mix for one minute, and turn off heat.


Now the choice is yours... either heap the steak on top of tortilla chips, or on top of your pizza crust that has been prepared already.  Then break the American cheese into pieces and place evenly on top.  Next place pepperoni on top as well.


Last comes the mozzerella, amount to your discretion.  Place in the oven at 450 until cheese is melted.


Take out and try to let cool before you eat!

*this has been an R&E original