Showing posts with label Snacks. Show all posts

Friday, February 19, 2016

Iron Rich Finger Foods: Baby Cakes

A baby post was bound to happen eventually, right?  Sorry, it comes with the territory these days, but I'll try to make it quick.  It's been a long (yet incredibly quick) journey from the screaming little nugget we brought home to this crazy, independent, opinionated, thoughtful, and cuddly little boy we see emerging.  While it seemed as if it would never happen, he finally is really into the solids, which is fun but also disgustingly messy.

Since he loves to eat now, I have started to try to increase his iron levels.  Why, you ask?  Well, at the risk of boring any non-parent, and because I am pressed for time, the short version is this: babies are born with enough iron stores to support their growth until 6 months.  After that they need supplementation to get the amount they need.  This can be through a vitamin, or through solids.  See?  That wasn't too painful was it?

Anyways.  He's still not really into meat yet, and since we are doing finger foods and not purees it means I have to get a bit more creative with his iron sources.  There's only so much peanut butter one kid can eat... or is there.  So, after much messing around, and lots of goopy, messy mealtimes, I finally came up with recipes that  fulfilled my desired criteria.  1) give a substantial amount of iron, 2) have a variety of food sources and vitamins, and 3) (hopefully) won't make him constipated.  My life is pretty awesome right now, can you tell?

The final goal was that these finger foods taste good, because let's be honest, if I am cooking I better be able to reap the rewards too.  The result?  The two recipes below.  Remember, you can eat these too.  I am more partial to the egg muffins but I imagine the bean cakes would taste delicious with eggs over them.  Of course, another baby friendly finger food is the muffin recipe from my previous post.  Bug really devours those.

Well, that's it for the baby talk today... here they are, enjoy!

Sweet Bean Cakes
  • 15 oz can of black beans (no salt added)
  • 1 cup shredded sweet potato raw
  • 1/2 cup mashed banana
  • 3 oz prune puree
  • 1 tsp cinnamon

Drain and rinse the beans. In a bowl, mash the banana and beans and add the rest of the ingredients.  Mix until combined but leave some texture.  Form the mixture into little cakes and place on greased baking sheet.  If the mixture seems too soft add a little flour or almond meal.  Cook for 15 minutes at 350, flatten with a spatula, and cook for another 10, until only slightly squishy.  Remove and let cool.


No, they are not attractive, but they taste delicious!  This also makes a ton so you can freeze excess cakes for future use.


Egg and Spinach Muffins
  • 6 large eggs
  • 1 cup steamed and diced spinach (I buy frozen then thaw and drain the liquid)
  • 1/3 cup shredded sweet potato (raw)
  • garlic powder, onion powder, pepper to taste

Combine all ingredients.  Pour into greased muffin tins filling 2/3 full, since they rise. If desired, sprinkle some cheese on top.  Bake at 375 for about 20 minutes until muffins have risen and are slightly brown and set.  Makes 6-8 cakes.


Saturday, May 23, 2015

Freezer Meals Part Two: Pre-cooked Originals

It's me again! Last time I shared some new easy to prep meals that I was then freezing in preparation for the arrival of our first child. Well, that was just part one. Today it's all about recipes I have already shared, but that I put a little twist on to make freezer-friendly. This time, they are pre-cooked, cooled, and then frozen in serving trays (see below) for easy re-heating. Not many pictures this time, but you can see the original blogs posts for the visuals...


Freezer Beef Chili - similar to this, minus the beer
  • 2 lbs ground beef
  • 1 onion, chopped
  • 1 pepper, chopped
  • 1 can Trader Joe's fire roasted green chiles
  • 1 can diced tomatoes (drained)
  • 1/2 can tomato sauce
  • ½ lb of frozen corn
  • 1 tsp curry powder
  • 1 tbsp chili powder
  • 1 tbsp cumin
  • garlic powder, onion powder, salt, pepper to taste
Heat pan on medium with a little olive oil, add pepper and onion, cook for a few minutes.  Add the meat, cooking for about 5 minutes until light pink.  Drain the fat, place back on stove, add all remaining ingredients.  Cook until slight pink remains.  Allow to cool.  If watery, drain a little liquid before portioning into ziploc bags or re-heatable container.


When ready to cook, place in crock pot on low for 3-4 hours.


Spaghetti Squash Bake - similar to this
  • 1 medium spaghetti squash (about 2 cups when shredded)
  • 2 lbs ground beef
  • 1 onion, chopped
  • veggies of choice, chopped (mushrooms, zucchini, pepper, etc.)
  • 1 can tomato sauce (14.5 oz)
  • 1 tsp onion powder
  • 2 cloves garlic, minced
  • 1 tbsp Italian seasoning
  • salt and pepper to taste
  • 1/4 cup cheddar cheese
  • 1/4 cup parmesan cheese
  • 1/2 cup mozzerella
Cut spaghetti squash in half and cook in oven at 350 until fork goes in easily... like in this blog post about shrimp scampi!  Set aside and let cool, then shred with a fork.

While squash is cooking, combine beef and onions in pan and cook until meat is light pink.  Drain grease and remaining ingredients EXCEPT cheese, stirring for about 5 minutes.  You don’t want the meat or veggies completely cooked.  Remove from heat and let cool.  Once cool, mix in cheddar and parmesan cheese.  Portion into re-heatable containers (glass or aluminum) and add mozzarella to the top of each.

When ready to cook, bake at 350 for 40-50 minutes, until bubbling.

Non-freezing option:
Follow above directions.  Instead of portioning into freezer containers, put in casserole dish and top with mozzarella.  Bake at 350 for 30-40 minutes, until bubbling.


The last item on the menu is my travel-able protein cookies that we love to take hiking. This one was not modified, just allow to fully cool and place in a ziploc bag and freeze!

Here's the meals (not scones or cookies) in the freezer ready to be eaten. Oh, and as always... enjoy :)


Thursday, July 10, 2014

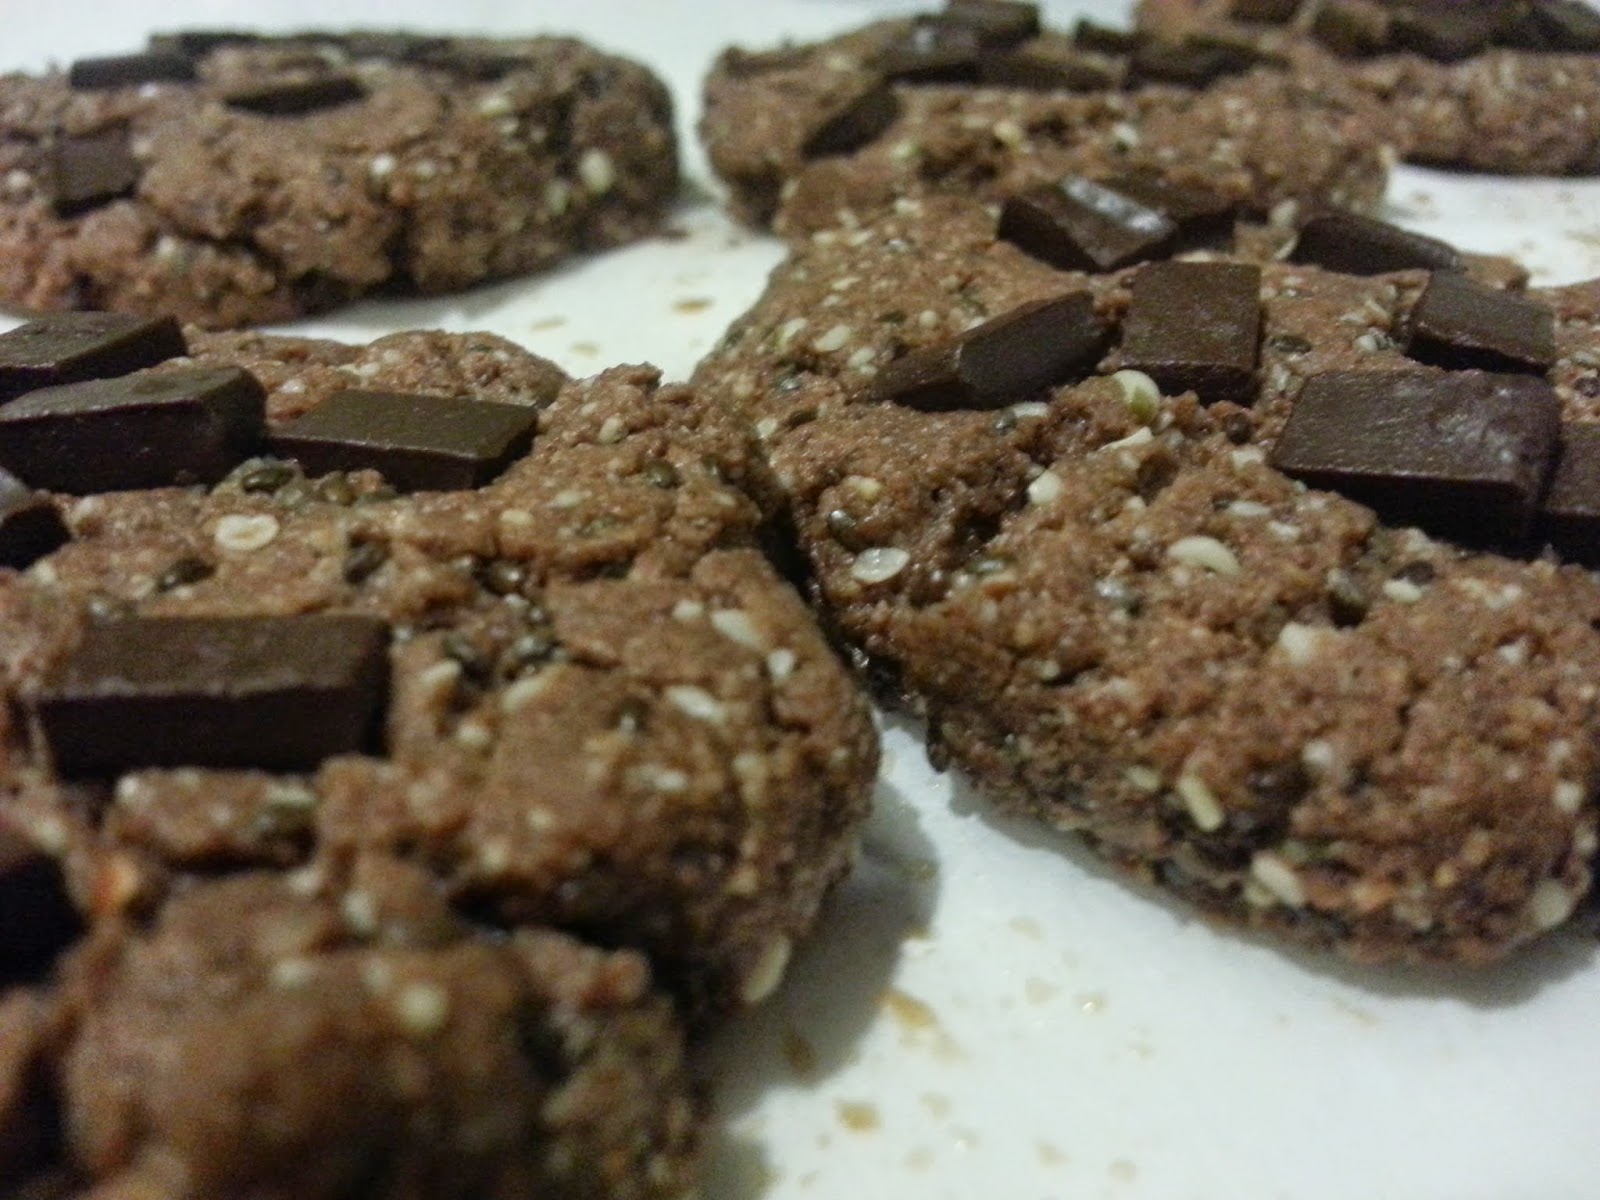
Summer on the Run? Chocolate Sea Salt Cookies!

Summer is officially in full swing, and that means vacations, sunshine, relaxing, and of course... camping and hiking!  Now, these cookies are the perfect evening snack, but they also pack a protein punch so they are perfect for throwing in your bag for a quick meal on the run.  Whether you are lounging at the beach and too lazy to head up for lunch, or bagging that next peak, these cookies are for you.  And they're easy and quick to make!

Chocolate Sea Salt Cookies

  • 1 cup almond butter (or any other nut butter)
  • 1/4 cup unflavored protein powder
  • 1/4 tsp sea salt
  • 1/8 cup chia seeds
  • 1/4 cup hemp seeds
  • 1/4 cup shredded coconut
  • 2 tbsp cocoa powder
  • 1/2 tsp baking powder
  • 1 tbsp maple syrup
  • 1/4 cup milk
  • 1/4 - 1/2 cup dark chocolate chips
Preheat oven to 350.  In a food processor, combine all ingredients except chocolate chips.  It will form a big sticky ball.  That's okay.  Just keep your fingertips moist with water and you will be fine

Form "dough" into 8 equal balls.  Place on lined baking sheet.  Flatten.


Add chocolate chips to the top, pressing in a bit.


Place in oven and bake for 10-20 minutes, until they are firm but not burned.
Let cool before removing from the cookie sheet, then either pack them away for your next adventure or... enjoy!


**modified from http://mywholefoodlife.com/2014/04/14/flourless-chocolate-cookies/

Monday, January 27, 2014

A Quick Meal: Lazy Cheesey Taco Dip

It's midwinter and I am sick of cooking creative meals.  Of course that means we could order delivery, but when my conscious gets the better of me that means I still have to cook.  Now, any day (or every day) of the week Eric and I have no problem eating tacos.  In fact there have been several weeks we had chicken tacos, then beef, then pork... then leftovers!  Why not?  Add a little guacamole and you've got a feast.  Plus it's easy.

But the recipe I want to share with you is even lazier than tacos.  That's right.  Lazier.  I mean, some days you just can't make your own individual tacos.  Having to physically layer the meat, then cheese, then all those toppings, FOUR TIMES?  Blech, I am tired just thinking about it.  No, some days you just need to take some chips, and dip.  Enter lazy taco dip... it's easier than prepping all those pesky shells, and equally delicious.  AND it's healthy!  We are fans.

Okay, let's do this.

Lazy Cheesey Taco Dip


  • 2 lbs ground beef
  • 1 pepper, diced
  • 1/2 onion or 1 bunch scallions, diced
  • 1 packet taco seasoning
  • 1 cup of spinach (per taco bowl)
  • Your choice of cheese (American or cheddar is my favorite)
  • Hot sauce of your preference
  • Salt and pepper to taste
  • Tortilla chips for dipping
  • Other taco dipping condiments


Step One: Make taco meat.  I saute the pepper and onion for a few minutes, then add the meat and brown it.  Add contents of the seasoning packet when there's a bit of pink left.


Step Two: Put a cup of spinach in the bottom of a bowl, add meat on top (you choose how much you want), layer cheese on top (not too much).


Step Three: Microwave for 1 minute, mix everything in bowl together, grab your chips and dipping paraphernalia (I recommend guacamole and sour cream), and you're done!  If you are against microwaves go ahead, layer it in a pyrex and heat it in the stove.  But then it's not quick, just easy.


Remember to add some hot sauce if you want, and as always, enjoy!


*this has been an R&E original


Sunday, January 12, 2014

Playoff Time: Steak Bomb Pizza or Nachos!

This will be short.  Same story, different month... so many recipes, so little time.  However, this recipe was too amazing not to post as soon as possible.  Combine that with football playoffs and you really can't go wrong.  Whether you make these for nachos, pizza,  or just eat it plain, any way you choose, there is no way you won't enjoy!

Steak Bomb Topping

  • 1 lb shaved steak
  • 1 pepper, chopped
  • 1 small onion, chopped
  • 2 cups chopped raw spinach
  • 2 tbsp butter
  • 1 tbsp soy sauce
  • 1 tsp garlic powder
  • 1 tsp onion powder
  • Salt and pepper to taste
  • Pepperoni (optional topping) 
  • Tortilla chips, pizza crust, or nothing

If making nachos or pizza:

  • Shredded mozzerella
  • 2 slices American Cheese

Heat the butter in a pan with the onions and peppers, mix until beginning to soften.  Then add the steak and spices except the soy sauce.  Continue to mix and separate meat into small bits.  Once there is only a small amount of pink left add the soy sauce and spinach, mix for one minute, and turn off heat.


Now the choice is yours... either heap the steak on top of tortilla chips, or on top of your pizza crust that has been prepared already.  Then break the American cheese into pieces and place evenly on top.  Next place pepperoni on top as well.


Last comes the mozzerella, amount to your discretion.  Place in the oven at 450 until cheese is melted.


Take out and try to let cool before you eat!

*this has been an R&E original


Sunday, September 15, 2013

It's Time: Minimally Modified Primal Pizzas

Yes, I've been gone for another three months.  I blame the whole getting married thing.  Oh, yeah, I got married!  But that's a story for another time.

THIS post contains recipes for the much requested primal pizza crusts I make.  No, they will not be fluffy or bread-like.  Yes, they will fulfill their role as a crust and hold your favorite toppings and even allow careful dipping into ranch dressing.  It will also leave you feeling much less bloated and gross AND lets you use all that eggplant, zucchini, or summer squash you have stockpiling from your crop-share.  Read your mind, didn't I?  So, since I have been MIA for so long I am going to get right to the point.  In order from our favorite to least (based on taste, ease of making, and crust abilities), here they are!

Ready?!  I am! 


Zucchini or Eggplant Crust
  • 1 lb (2-3 cups) grated zucchini/eggplant
  • 1/3 cup parm cheese
  • 1/2 cup almond meal
  • 1-2 tbsp coconut flour (for moisture)
  • 1 egg

Step one: take your grated veggie, salt it, and wrap it in some paper towels.  Repeat this twice over the course of a few hours for best results.  Not necessary, but makes the crust crispier.  The examples below are all of eggplant, but zucchini follows the same rules.


 When ready to make pizza, preheat oven 450 degrees.  Combine all ingredients.  Add a light sprinkle of coconut flour if still super moist.

Lay parchment paper on a pre-oiled baking sheet.  Oil parchment paper as well.  using your hands, a fork, or spatula, carefully spread the ball of "dough" slowly outward, making it thin (no thicker than 1 cm).


When it looks similar to the picture above (this one is zucchini), put it in the oven for 15 minutes.  I should look like the below picture.  If not, put it back in until it does.


Then remove pan, flip crust, and 5ut it back in for another 5 minutes or until it looks like the below picture..


Take crust out, add toppings (pre cook any non-cured meat), cook at 350 until cheese is melted, and eat!


Before we go any further;
topping suggestions for ALL pizzas:

Pepperoni, chicken sausage, sauteed kale/peppers/onions, broccoli, bacon (!), mushrooms, pesto, garlic, mozzarella cheese, meatballs, buffalo chicken, buffalo chicken meatballs... the list could go on.


This next one is from this website, modified minimally.  Try as we might this one always ends slightly floppy.

Flax Seed Pizza Crust
  • 1/2 cup flax meal
  • 1/2 cup almond meal
  • 1/2 cup finely grated parmesan cheese
  • 2 eggs
Mix the flax meal and parmesan cheese in a medium bowl.  Add the eggs and stir until a dough is formed.  It will be sticky, like really really obnoxiously sticky.  Let it sit for about 5 minutes or so until it's easier to work with. Wet your hands with water to help keep the dough from sticking to them and press onto parchment papered cookie sheet about 1/3 inch thick in a circle.

You should get about a 10 inch circular crust out of it... if it's a lot smaller than that you are making it too thick.  Bake crust at 350 for 8 minutes, or until top is lightly browned.  Remove an add toppings.  For this one I made buffalo chicken meatballs and spinach!  Bake for another 15 minutes at 350.  Remove when cheese is melty and delicious (sorry, no picture of that part!).


Okay, this one has been in my files for a while, but for the life of me I cannot find any notes besides:

1) I made it and added a few modifications
2) It was the least favorite
3) The original recipe comes from The Almond Flour Cookbook by Elana Amsterdam.

Then I tried to find the original and couldn't.  Good story, I know.  Anyways, try it for yourself, perhaps you will have better luck!

Almond Flour Pizza Crust
  • 1 1/2 cups almond meal
  • 1 egg
  • 1 tbsp olive oil
  • 1/2 tsp salt
  • 1/2 tsp baking soda 

Mix ingredients well, using your hands to form a ball.  Again, it will be sticky.  Place the ball between two sheets of parchment paper and pat it out into a crust shape.  Place on a well sprayed pizza stone OR parchment lined baking pan.  Bake at 350 for 15-20 minutes until lightly brown.

As with the others when it's ready remove, add toppings, and wait for melting goodness.

These isn't it, but still.  Yum.  Oh, and enjoy!


Monday, October 29, 2012

The Best Fall Treat... Homemade Applesauce!


It's simple, really.  You just need apples... lots and lots of apples.  Okay, maybe not THAT many, but enough to make plenty of delicious, no sweetener needed, applesauce.  It's one of those fall staples that never goes out of style.  What else are you going to do with all your extra, slightly bruised, no longer crispy, apples anyways?  And guys?  This is so easy.  All you need are apples, water, and one of those fancy turn handle thingees that I don't know the name of... I think it's called a ricer :)


This is the only applesauce I grew up with, and it held fond memories.  Dad would "rice" and at the same time help me make gingersnaps.  Then we'd have a delicious snack at the end.  Mott's applesauce could not, and still cannot, hold a candle to the real, homemade deal.  And as usual, I will promote local WMass apples to be used whenever possible.  They are just better, or I am just spoiled.

Anyways, here's the recipe.  It seriously is so simple, but if you add anything else to this it just won't be as good.  I promise.


Applesauce
  • Very ripe McIntosh apples, as many as you want... do not peel!
  • Water
  • "Fancy turn handle thingee" aka ricer


Here goes... quarter and de-seed your apples.  DO NOT remove the skin, that's half the flavor!  The ratio (oh yes, there's math here) is 6 cups apples quartered and seeded to 1/4 cup water.  This means for every SIX cups of apples you add 1/4 cup of water.  Therefore, if you have NINE cups of apples you need 1/4 + 1/8 which equals 3/8... see that?!


Anyways, combine the apples with the appropriate amount of water in a big stock pot with cover on.  Heat on medium so that you get a nice steaming action.  Keep the cover on, you don't want the water to evaporate!  Keep an eye out, you can poke around the apples every once in a while to make sure they all get evenly mushy.  And that's just it, when they are mushy, not soft, but MUSHY, you are ready.


Take the apples out with a spoon and grind grind grind it all through your ricer, skin and all.  What comes out the other end (into a BOWL please, not your counter) is pure applesauce deliciousness.  Keep grinding until you are all done, make sure the skins are in the grinding process because it really does add flavor.

Let it cool completely before storing in the fridge, or if you were really ambitious seal it in a ziploc and freeze the extra... it will keep until next season!  Or, you can do what any good WMasser would do and eat it still warm with a little vanilla ice cream, whipped cream, gingersnap cookie, plain, with pork chops, or on top of pancakes.  But, whatever you choose, it will be the best applesauce you've ever tasted.  If not, let me know!


Oh, and... enjoy!


Wednesday, August 29, 2012

Cave Couple Hikes and Eats: What Three Days Looks Like

Just recently Eric and I spent 3 days wandering the Presidential region of the White mountains.  It was an incredible experience, one that we are already planning a repeat of for next summer, and one that taught us a lot about a lot.  During those three days we were challenged physically and mentally, but pre-traverse we also found ourselves challenged culinar-illy.

Of course when we were planning the first thing on our minds was what to eat.  In case you didn't know, I am mean (understatement of the year) when I am underfed.  The idea of logging 9+ miles a day over the tallest range of mountains in New Hampshire with a full pack was daunting from the start.  This combined with fact that we'd be burning way more calories than usual presented a primal challenge of sorts.

The huts we were staying in knew we would need gluten free meals, but gluten free is not always primal.  Therefore, Eric and I had to plan meals that would sustain us during the day, and perhaps even make up for another meal if the hut food did not suffice.  Needless to say, it DID suffice, but we found that carrying 25% of our body weight up 5,000 foot mountains ensured that we ate all we brought.

This brings me to our food.  Below is the list of what we brought, along with any necessary recipes.  We found that for our trip it was the perfect amount of food, taking into consideration that breakfast and dinner were provided for us but didn't contain as much protein as we'd usually have had during those times.  Everything listed below lasted for four days not refrigerated, except the eggs.

Oh, and if you just want the yummy snack/dessert recipe, just scroll to the bottom!

We brought:

Hard-boiled Eggs (5)
Submerge in water and turn on high, leave alone for 22 minutes, then remove from heat.  Crack shells and let sit in cold water for at least 5 minutes before peeling shell off.  Must eat the first day

365 Beef Jerky (4 oz)
I still haven't found any that I am satisfied with, most brands have a lot of sugar and preservatives.  We settled on the only brand carried at our local Whole Foods, which were the 2 oz packs.

Tuna Packets Plus Condiments (6)
Starkist 2.6oz plastic packs, mayo, salt, pepper

Pepperoni
One pre-sliced pack

Cheddar Cheese
Two Cracker Barrel pre-sliced packs

Think Thin Protein Bars
Not the most primal thing, but these were our emergency bars, we only ate one each.  You can get them at Trader Joe's... the peanut butter chocolate one is recommended.  Bring at least two each.

Lara Bars
Same idea as the protein bars, but have less protein.  We brought one each.  Also can be bought at Trader Joe's.

Candy of Choice
Chewy Sprees, Gummy Bears, Sour Patch Kids... it's not primal but it keeps Rachel happy.

Eric's Pesto
Seriously the best thing we packed

Macadamia Nuts
We buy them from BJ's... highly recommended.

Hiker's Protein Shake
(feeds two)
  • 1 coconut milk juice box (8.5 oz)
  • 8 oz water
  • 3 scoops chocolate whey protein powder
  • 2 tbsp chia seeds
First of all, we got our "juice boxes" from an Asian supermarket called Super 88.  I don't know where else you can get full fat coconut milk like this, so look around.  We premixed the powder and seeds in ziploc bags and then added the coconut milk to water in a Nalgene when we were ready to have it.  Absolutely necessary and 100% filling on the trail.

And now for the grand finale.  I found this on my favorite site after lots of searching for a protein bar that was primal but also did not need to be refrigerated... and I hit it big!  One of these bad boys filled me up, made me happy, gave me energy, and was good for at least two hours of satiability.  Only downside is they are heavy.  These aren't just for hiking either, they've gotten lots of compliments as a dessert too!

Travel-able Protein Bars
aka Primal 7-layer Bars
aka Granola Bars
  • 1/2 cup almond meal
  • 1/2 cup walnuts or pecans
  • 1/4 cup unsweetened shredded coconut
  • 1/4 cup almond butter
  • 1/4 cup coconut oil
  • 1/4 cup flax meal
  • 2 tsp pure vanilla extract
  • 1/2 tsp of raw honey
  • 1/2 cup protein powder (preferrably unsweetened)
  • 1 large egg, whisked
  • 1/2 tsp sea salt
  • 1 tsp cinnamon
  • Optionals:
    • 1/2 cup dried cranberries or blueberries
    • 1/4 cup chocolate chips
    • 1/4 cup unsweetened coconut to sprinkle on top
Pour almond meal, coconut, and walnuts into a food processor and pulse until the mixture becomes coarsely ground (sort of the consistency of bread crumbs).

In a mixing bowl, melt coconut oil, honey, and almond butter (about 30 seconds). Remove from microwave and stir until smooth.  Next add vanilla extract, cinnamon and sea salt. Mix thoroughly.


Fold in nut mixture, flax meal and protein powder until mixed thoroughly.  Add whole egg and mix thoroughly.  Fold in blueberries/cranberries/raisins/chocolate chips.


Press mixture into greased 8 x 8 loaf pan and cook at 325 degrees for about 20 minutes, until edges start to brown.  Let cool, then cut into 12 pieces/bars.  Enjoy or stack on wax paper/parchment and store in an airtight container.  If bringing hiking you must keep it in a container, otherwise it crumbles.


**not much was changed from the original

Well, that's all for this post.  Remember to check out the pictures and stories that go with this food adventures at http://placesericdoesntakeme.wordpress.com/... and as always, enjoy!